Integrations
Jira Server Integration Guide
Configure bidirectional sync between Jira Server or Data Center issues and PagerDuty incidents, including field and state mapping.
Jira Server + PagerDuty Benefits
- Tackle critical service requests and accelerate incident resolution with bidirectional sync between Jira Server issues and PagerDuty incidents.
- Populate out-of-the-box or custom issue fields, sync incident priority and notes, and configure state mapping between Jira and PagerDuty.
- Jira Server users can leverage PagerDuty's integrations and PagerDuty AIOps functionality.
- This integration also supports Jira Service Management.
Jira Cloud Integration
Requirements
To Configure the Integration
In PagerDuty:
- This integration only works with Jira Server for PagerDuty customers on the following pricing plans: Professional, Business, Digital Operations (legacy), and Enterprise for Incident Management.
- The Jira administrator configuring this integration must also be a user within the PagerDuty account with valid login credentials.
In Jira Server:
- To configure the integration, you must have Jira administrator permissions.
- This integration is for Jira Server (self-hosted). You can find the current version compatibility and download the integration from the Atlassian Marketplace.
To Use the Integration
In PagerDuty:
- You must have a PagerDuty user license to use the integration.
How It Works
- Based on predefined rules set in Jira, when a PagerDuty incident performs a condition's action, a webhook is sent to Jira where it can create or update an issue.
- When a Jira issue performs a predefined condition's action, a webhook is sent to PagerDuty where it can create or update an incident.
Version
This guide details configuration of the Jira Server V4.3.3 integration.
Looking for a Different Version?
Integration Walkthrough
In Jira Server
- From the Jira Administration menu in the top right corner, click Manage Apps.
- In the Atlassian Marketplace, search for PagerDuty and select the appropriate Jira Server download for your service region:
- US Service Region: PagerDuty for Jira Server & Data Center.
- EU Service Region: PagerDuty for Jira Server & Data Center (EU only version).
- After installing, select Manage Apps from the left menu, select PagerDuty, and click Configure.
- Click Login with PagerDuty and log in to connect your PagerDuty account.
- Click Connect Jira to PagerDuty to open the next screen where you will configure your account.
- Add the required fields for the Jira instance you are working in. Click Save when finished.
- When entering URLs, always specify the protocol (
httporhttps) in the field. If the protocol is not specified, the integration will usehttp. - Authentication Requirements: You must configure an integration user account in Jira with read/write access to all connected projects. This integration user can authenticate using one of two supported methods:
- Basic Authentication (Username/Password): Enter the integration user's Jira username and password directly into the configuration fields.
- Personal Access Token (PAT): Generate a Personal Access Token for the integration user in Jira, then paste the token into the designated field.
- When entering URLs, always specify the protocol (
SSO Not Supported
Configure Automation Rules
To configure automation rules via the PagerDuty web app, continue following the instructions below. To configure automation rules via API, see the Jira Server Integration API documentation.
- Configure automation rules to automatically trigger incidents, create issues, and keep status updates synchronized between PagerDuty and Jira. If you are already on the PagerDuty settings page, select the Rules tab and click Create Rule. If you are returning to configuration, navigate to Manage Apps PagerDuty Configure Rules tab and click Create Rule.
- Enter a Rule name, Select PagerDuty service(s), Select JIRA Project(s), Select JIRA Issue Type(s), and optionally check the Sync comments & notes checkbox.
- Check the following rule options based on your preferences:
Automatically create PagerDuty incidents from JIRA issues:
- When issue matches JQL: Enter your preferred JQL. Select whether you would like this rule to run On issue create and/or On issue update.
- Additional actions after incident is created (optional): Select your preferred actions.
- Another form will auto-populate below, and you may choose to add multiple conditions based on your preferences.
Create JIRA issues from PagerDuty incidents:
- Create issue when incident: Select your preferred incident action that will generate a Jira issue. Optionally, specify the priority and/or urgency by selecting an option from the AND priority is one of and/or AND urgency is dropdowns.
- Create issue into project: Select the Jira project where you would like PagerDuty incidents to generate Jira issues. Select the Issue type you would like generated, and if your Jira issue type has any required fields, set those required fields to populate by choosing Additional actions on issue create (optional).
- Another form will auto-populate below, and you may choose to add multiple conditions based on your preferences.
Automatically update Jira issue:
- When PagerDuty incident has linked issue AND: Select your preferred incident action that will update a Jira issue. Optionally, specify the priority and/or urgency by selecting an option from the AND priority is one of and/or AND urgency is dropdowns.
- Actions: Select your preferred Jira issue action that will occur based on the condition specified above.
- Another form will auto-populate below, and you may choose to add multiple conditions based on your preferences.
Automatically update PagerDuty incident:
- When Issue status changes to: Select your preferred Jira status that will update the PagerDuty incident.
- Actions: Select your preferred PagerDuty incident action that will occur based on the condition specified above.
- Another form will auto-populate below, and you may add multiple conditions based on your preferences.
Click Save to save your rule(s). You should see the following webhook check dialog if the connection was successful:
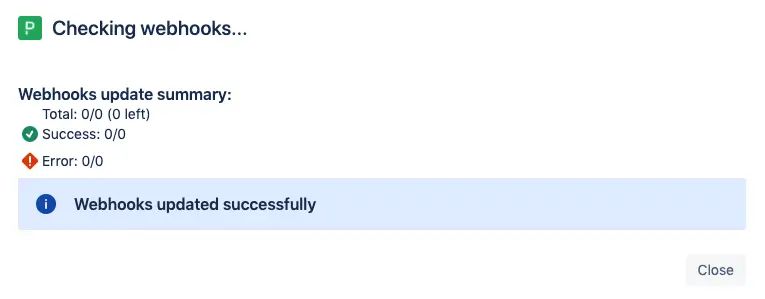 Webhook update summary
If you receive an unsuccessful webhook error, navigate back to the Rules tab and click Check webhooks… to troubleshoot the error. Once the webhook check has been successfully completed, proceed to the next section to link your PagerDuty and Jira accounts.
Link PagerDuty and Jira User Accounts
Linking PagerDuty and Jira user accounts allows the integration to identify which user changed an incident or issue. It also allows you to define who an incident or issue should be assigned to. If a user account is not linked and a Jira fallback user has not been configured (see step 17), the integration will not pick up those user-made changes. A Jira administrator can link user accounts, or individuals can link their own PagerDuty accounts between systems.
- To have a Jira administrator link the accounts: Follow steps 14–17 below.
- To have individual users link their accounts: Skip to step 18.
- If you are still on the PagerDuty settings page, select the User mapping tab and skip to step 16. If you are returning to configuration, from the top right Jira Administration menu, select Manage Apps.
- Select Manage Apps again from the left menu, click the PagerDuty add-on, then click Configure.
- Under PagerDuty settings, click the User mapping tab and click Link Users to start mapping user accounts between systems.
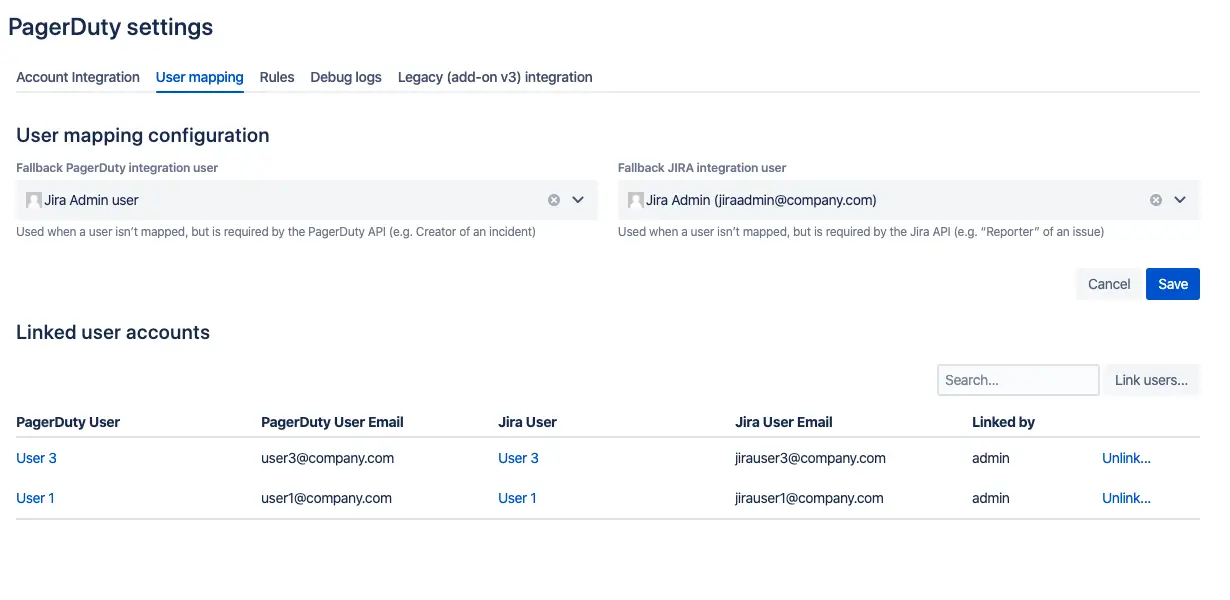 User mapping configuration
- On this page you can also optionally map users based on email, and set a fallback user in the event that a user wants to take action on an incident but their account is not mapped.
- To have individual users link their accounts, they will need to go to an issue in your Jira project and click the Users icon to link their user accounts. If the icon is orange, their user account is not linked. Once linked, the icon will appear grey.
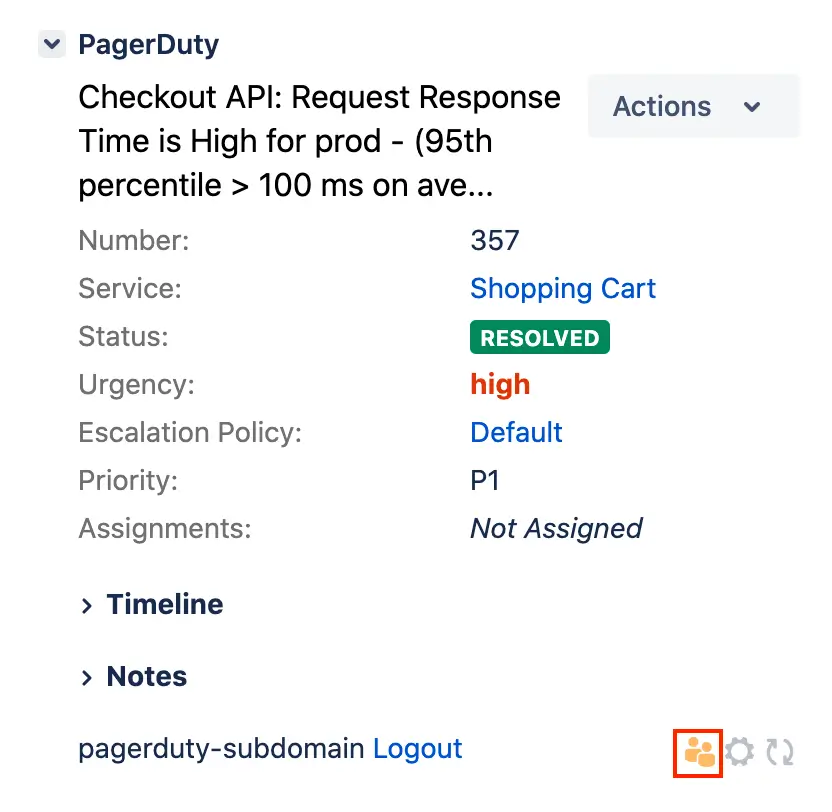 Incident details
Once your Jira and PagerDuty accounts have been linked, the integration is complete.
Connect Multiple PagerDuty Accounts
To connect multiple PagerDuty accounts, navigate to the Account Integrations page and click Logout at the bottom of the page. Click Login with PagerDuty and log in on the screen that appears to connect your PagerDuty account. You will need to complete the Integration Walkthrough steps 1–3 and complete the Link PagerDuty and Jira User Accounts section again based on your secondary account information.
Connect Multiple Jira Accounts
To add another Jira account, log in to the secondary Jira instance and complete the Integration Walkthrough steps 1–13.
Jira Service Management Required Steps
- If you are integrating PagerDuty with Jira Service Management, ensure that the PagerDuty user account in Jira has the necessary permissions.
- For each of your Service Desk projects, ensure that the PagerDuty user account has Service Desk Team access:
- From the Jira Administration menu in the top right corner, click Projects.
- Select your Jira Service Management project.
- Click the Users and roles tab under the Project settings navigation bar.
- Select the Add users to a role button.
- Add the
jira-servicedesk-usersgroup or PagerDuty user to the Service Desk Team role.
You can learn more about managing users and roles in Atlassian's documentation.
Migrate from Jira Server to Jira Cloud
No automatic migration path is available at this time. To migrate from Server to Cloud:
- Follow the instructions to configure the Jira Cloud integration with the necessary service mappings. Test the flow by following the Jira Cloud User Guide.
- Uninstall your Jira Server integration once you have configured the Jira Cloud integration.
Uninstall Jira Server
- Navigate to Integrations Extensions and click Jira Server Extension to the right of your extension.
- Click How to Uninstall, follow the instructions listed, and click Delete Configuration.