Integrations
Jira Server v3 Integration Guide
Configure the legacy Jira Server v3 integration — authentication token setup, plugin installation, and project connection.
Jira Server v3 + PagerDuty Benefits
- Bidirectionally sync issues between Atlassian Jira Software and PagerDuty.
- Incidents triggered in PagerDuty can automatically open an issue in Jira and populate both custom and out-of-box issue fields.
- Issues in Jira can also trigger a PagerDuty incident, helping your team stay on top of time-sensitive issues.
- Sync incident priority, incident notes, and state mapping.
- This integration also supports Jira Service Management.
Requirements
In PagerDuty: You need a Global Admin or Account Owner user role to create the Jira authentication token.
In Jira: You need to be able to perform the following actions:
- Create, update, and comment on issues
- Run JQL searches
- Read Projects
- Read Settings (for example, globally configured Priorities)
How It Works
- Based on predefined rules set in Jira, when a PagerDuty incident performs a condition's action, it sends a webhook to Jira where it can create or update an issue.
- When a Jira issue performs a predefined condition's action, it sends a webhook to PagerDuty where it can create or update an incident.
Version
This integration is for the self-hosted Jira Server 7.2.0–8.x.x, which can be downloaded from the Atlassian Marketplace. If you use Jira Cloud, see the Jira Cloud integration guide.
Looking for a Different Version?
Integration Walkthrough
In PagerDuty
In PagerDuty, you add the Jira Server extension and create a unique authentication token for use in the next section.
- In the web app, navigate to Integrations Extensions and click New Extension.
- From the dropdown select Jira Server. A screen appears prompting you to open the Jira Server Extension page; click Open.
- Under Please ensure you use Jira add-on version at least 4.2.0, click here to expand the configuration options.
 Expand configurations options
- Copy the authentication token to your clipboard, which you use later in this guide.
 Jira Server authentication token
- Log in to your Jira Server application.
- Note: You need to paste the authentication token into the PagerDuty add-on in Jira before you can connect PagerDuty to Jira Server.
In Jira
In Jira, you download the PagerDuty for Jira Server & Data Center plugin and add the PagerDuty authentication token you copied in the previous section.
- From the Jira Administration menu in the top right corner, click Add-ons.
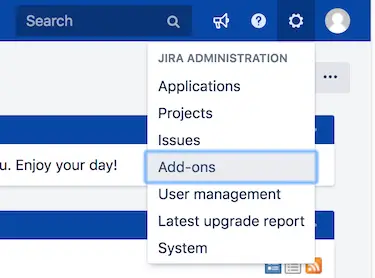 Select Add-ons
- Click the Add-ons tab, then click Find new add-ons in the Atlassian Marketplace. Search for PagerDuty for Jira Server and click the Install button.
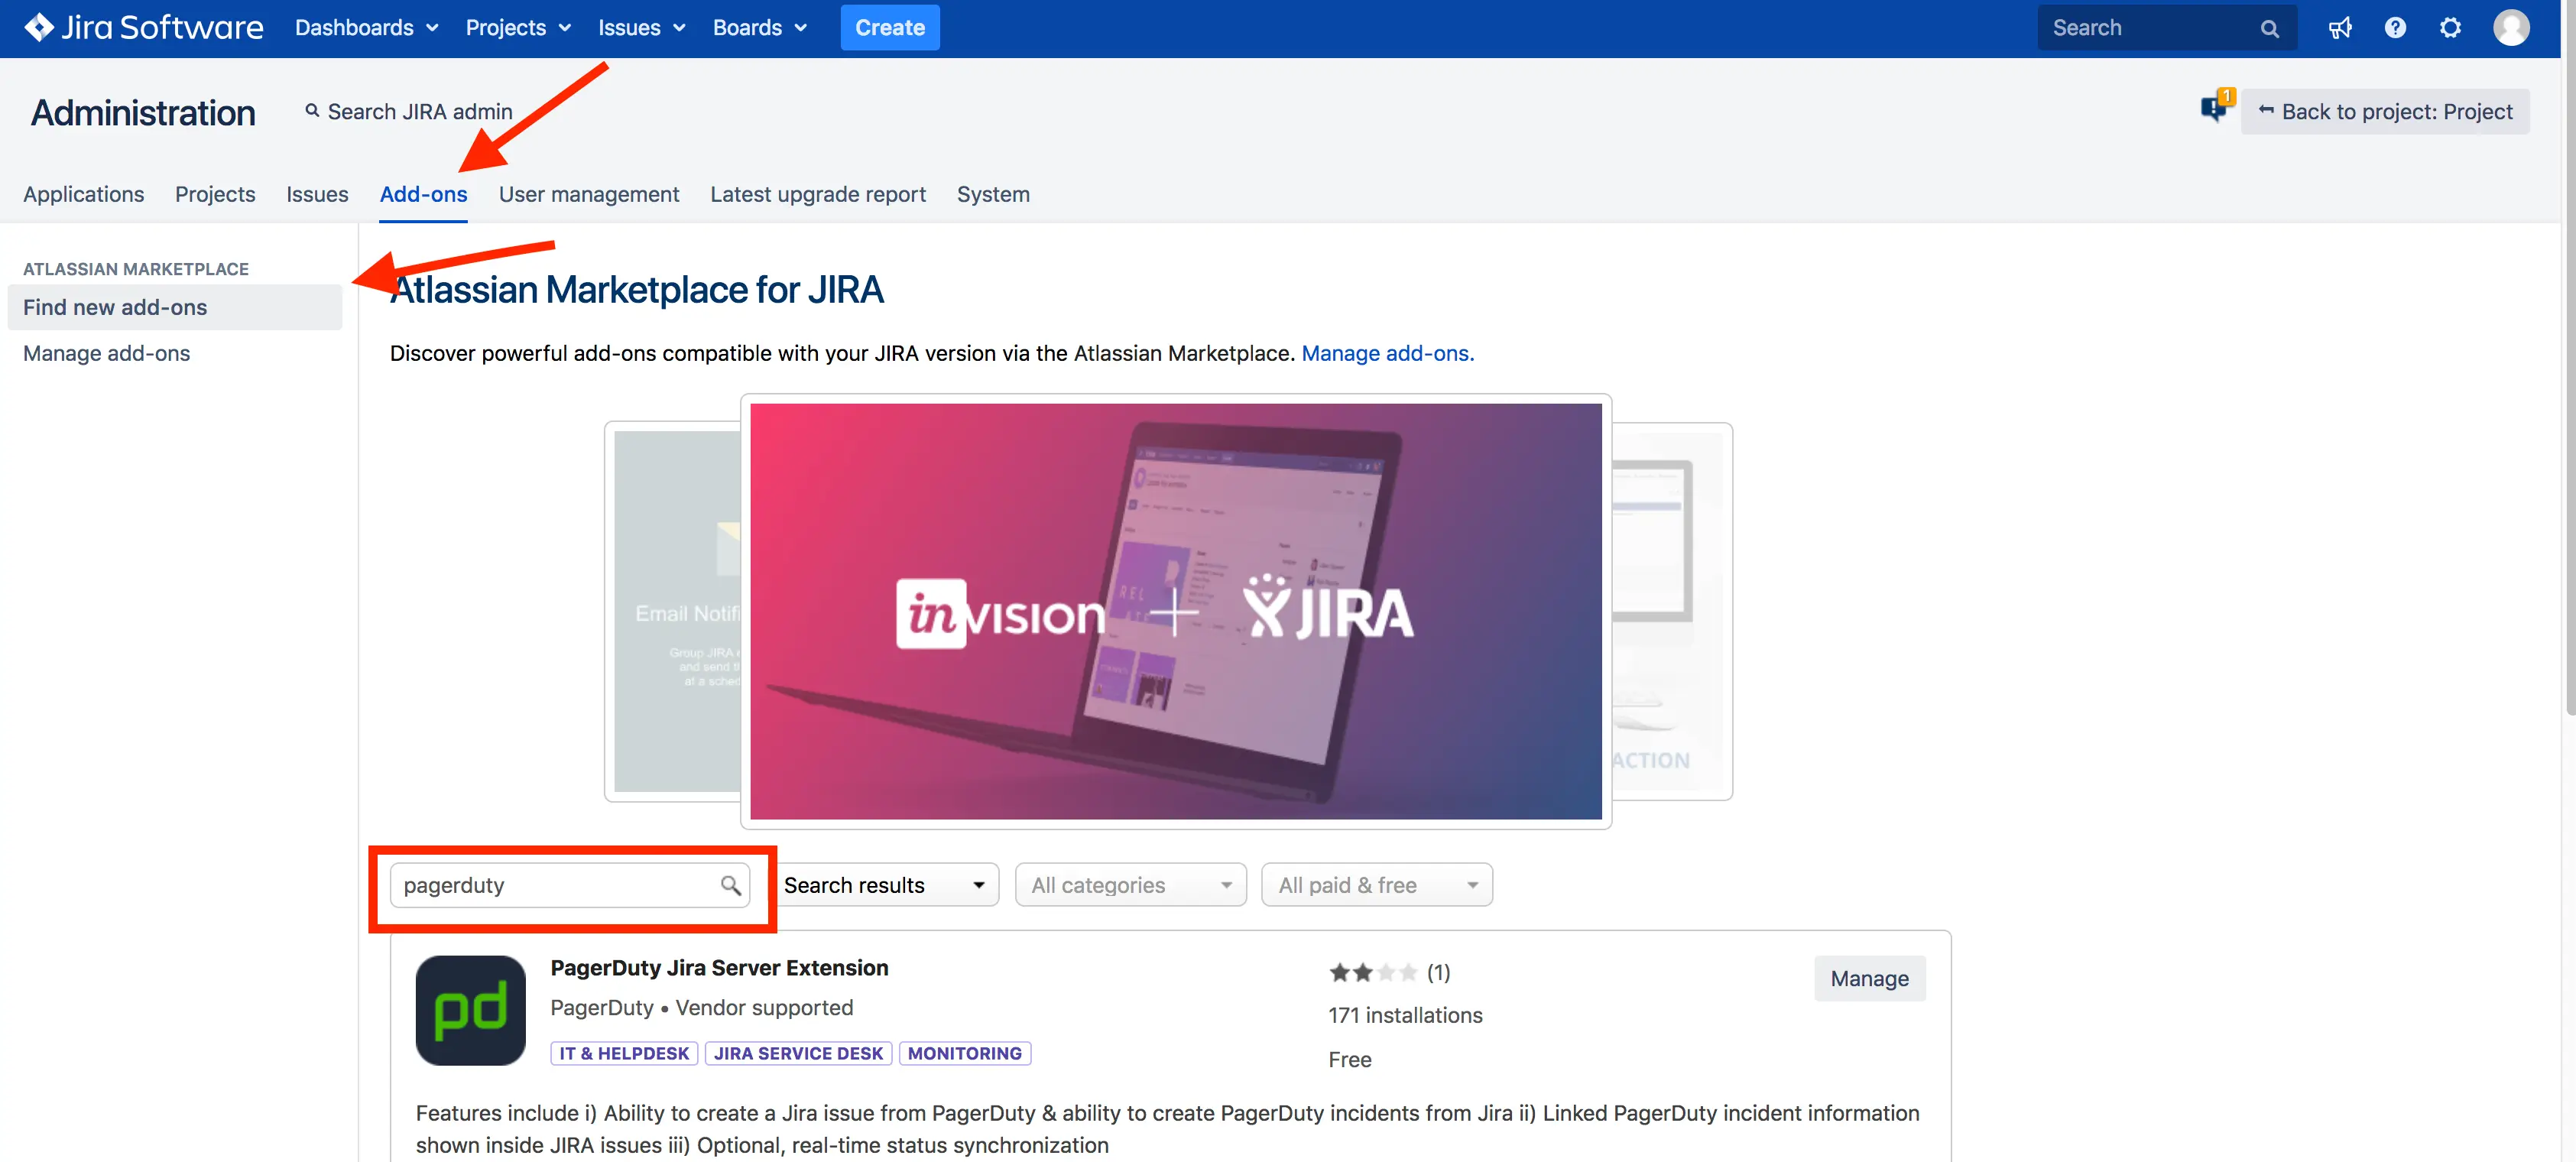 PagerDuty add-on in Jira
- After returning to the Manage Add On page, select PagerDuty add-on, and click Configure.
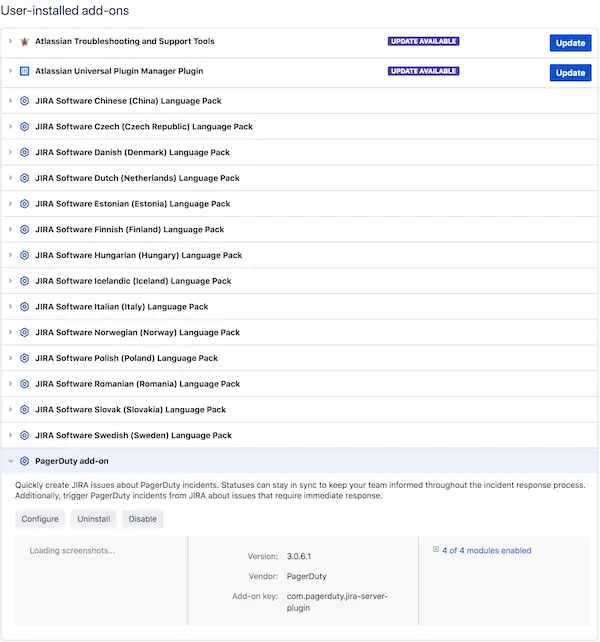 Install PagerDuty add-on
- Add the Authentication Token you copied from the PagerDuty extension configuration and click Save.
- Ensure a user account with the name
PagerDutywas created in Jira, with write access to applicable issues and projects. You can check out the minimum required project roles in our FAQ.
In PagerDuty
The last step is to connect PagerDuty to Jira and configure the mapping between a PagerDuty Service and a Jira project.
- Enter your Jira Server URL and click Connect Jira Server.
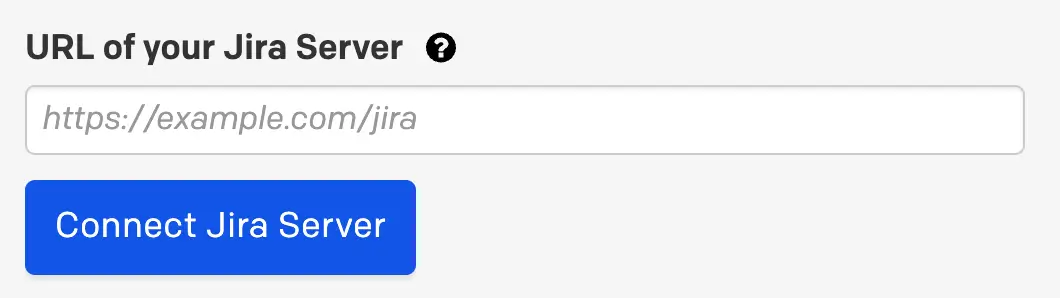 Enter Jira Server URL
- If the connection was successful, you should be able to select a PagerDuty service and corresponding Jira project. After selecting both, click Connect Jira Project.
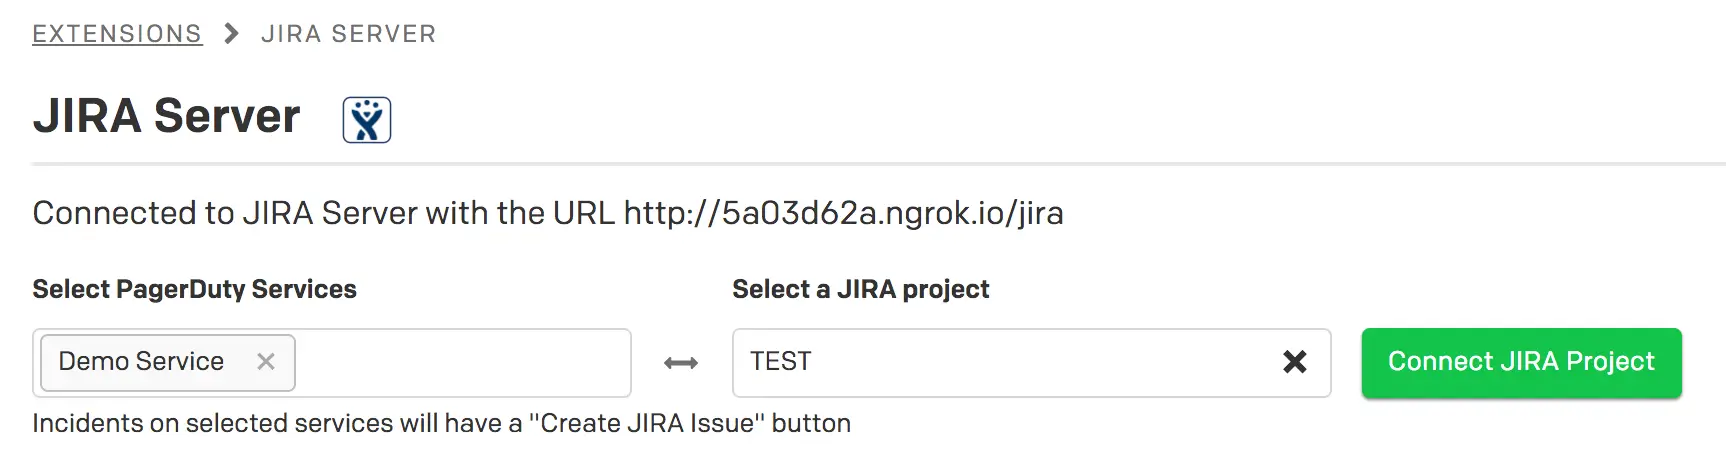 Connect Jira project
- After connecting, you are taken to a configuration page where you can:
- Select a Configuration Name. We recommend using the name of the Jira project. For example: "Create Bug (Project Name)".
- Choose a Jira Issue Type.
- Choose an option for Create Issues Mode:
- Manually: Must click the Configuration Name under the More Actions button on an incident details page.
- Automatically: PagerDuty automatically creates Issues in Jira.
- Create a Jira Query Language (JQL) statement which can automatically create PagerDuty incidents if a Jira issue matches the JQL. Note: The issue must be in the same Jira project and be the same Jira Issue type. If you are using Jira Service Management, incidents are created from JQL before automation rules are applied.
- Map the status of PagerDuty incidents to the status of Jira Issues.
- Optionally, sync notes between PagerDuty and Jira. Note: This option requires you to select a user, and each note appears as coming from this user.
- Optionally, sync PagerDuty incident priority levels with Jira priority levels.
- Optionally, sync custom fields between a PagerDuty Attribute and Jira Issue Field Name.
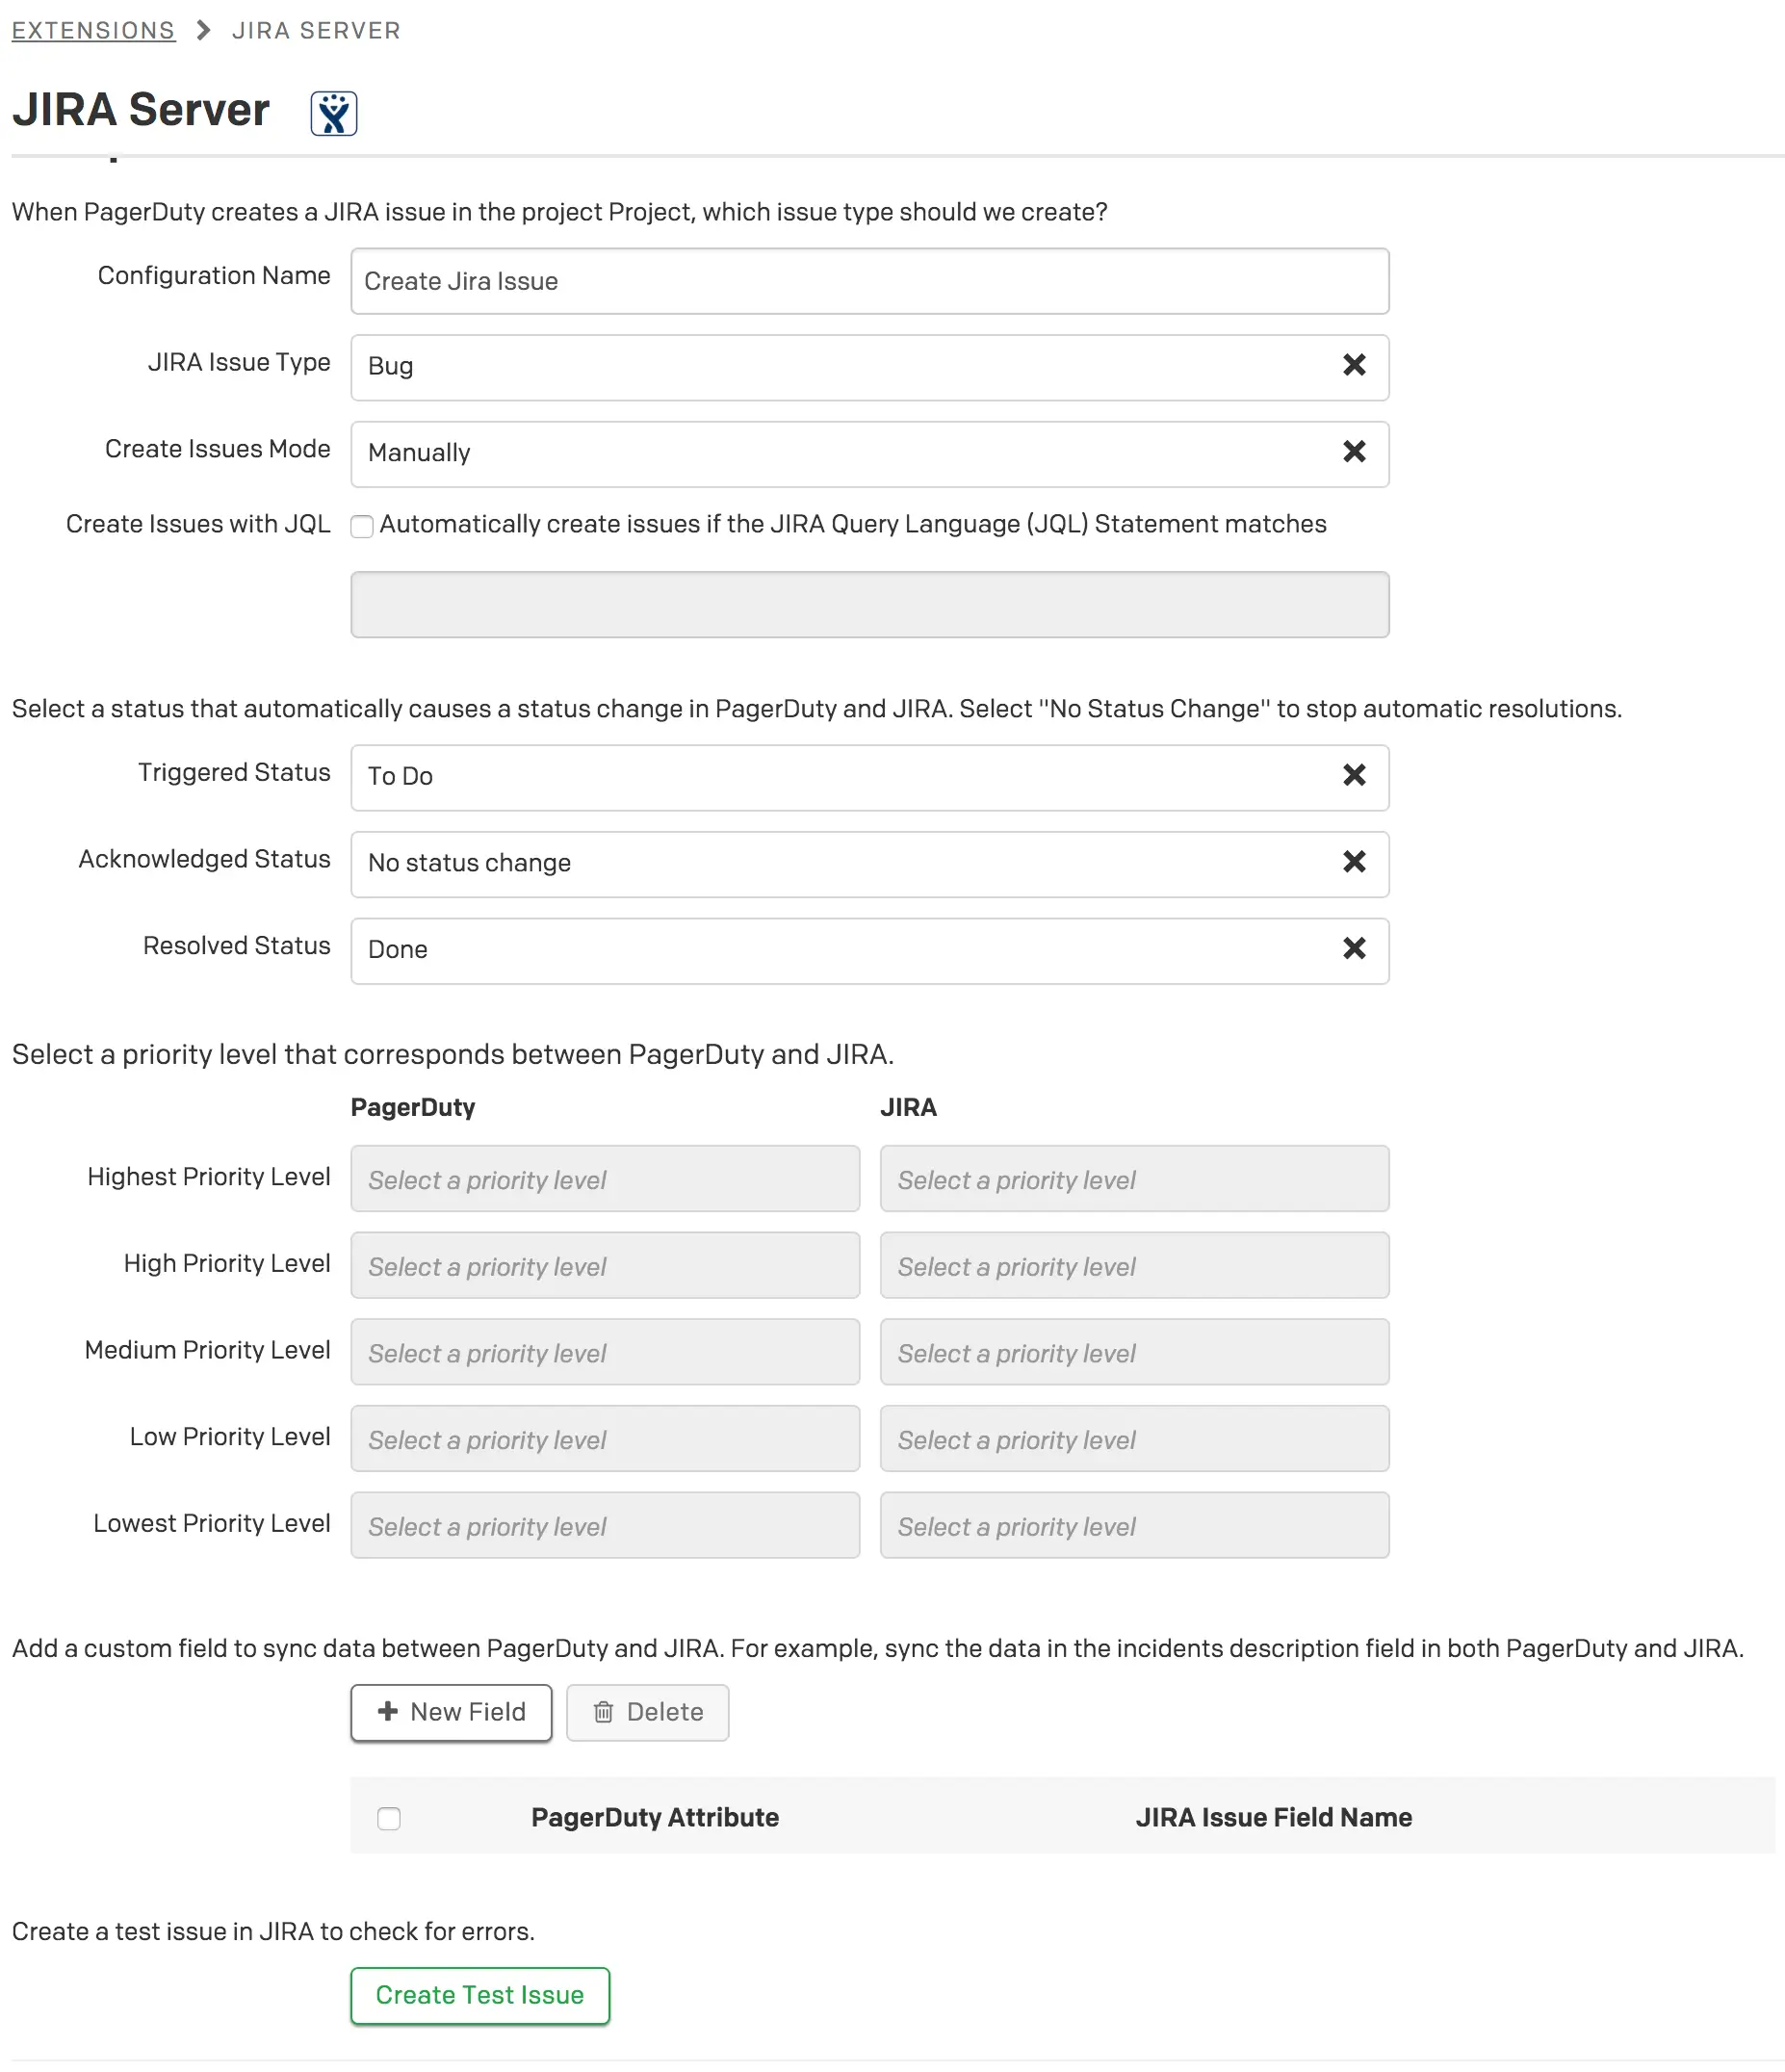 Configure the integration
- Click Create Test Issue to test the connection between PagerDuty and your Jira Server. You should see a success message at the top of the modal and the new ticket is visible in Jira.
- Click Save, and you are done 🎉.
Jira Service Management Required Steps
If you are integrating PagerDuty with Jira Service Management, the PagerDuty user account needs the necessary permissions in Jira.
- Add the
jira-servicedesk-usersgroup to the PagerDuty user account. - For each of your Service Desk projects, ensure that the PagerDuty user account has Service Desk Team access:
- From the Jira Administration menu in the top right corner, click Projects.
- Select your Jira Service Management project.
- Click the Users and roles tab under the Project settings navigation bar.
- Select the Add users to a role button.
- Add the
jira-servicedesk-usersgroup or PagerDuty user to the Service Desk Team role.
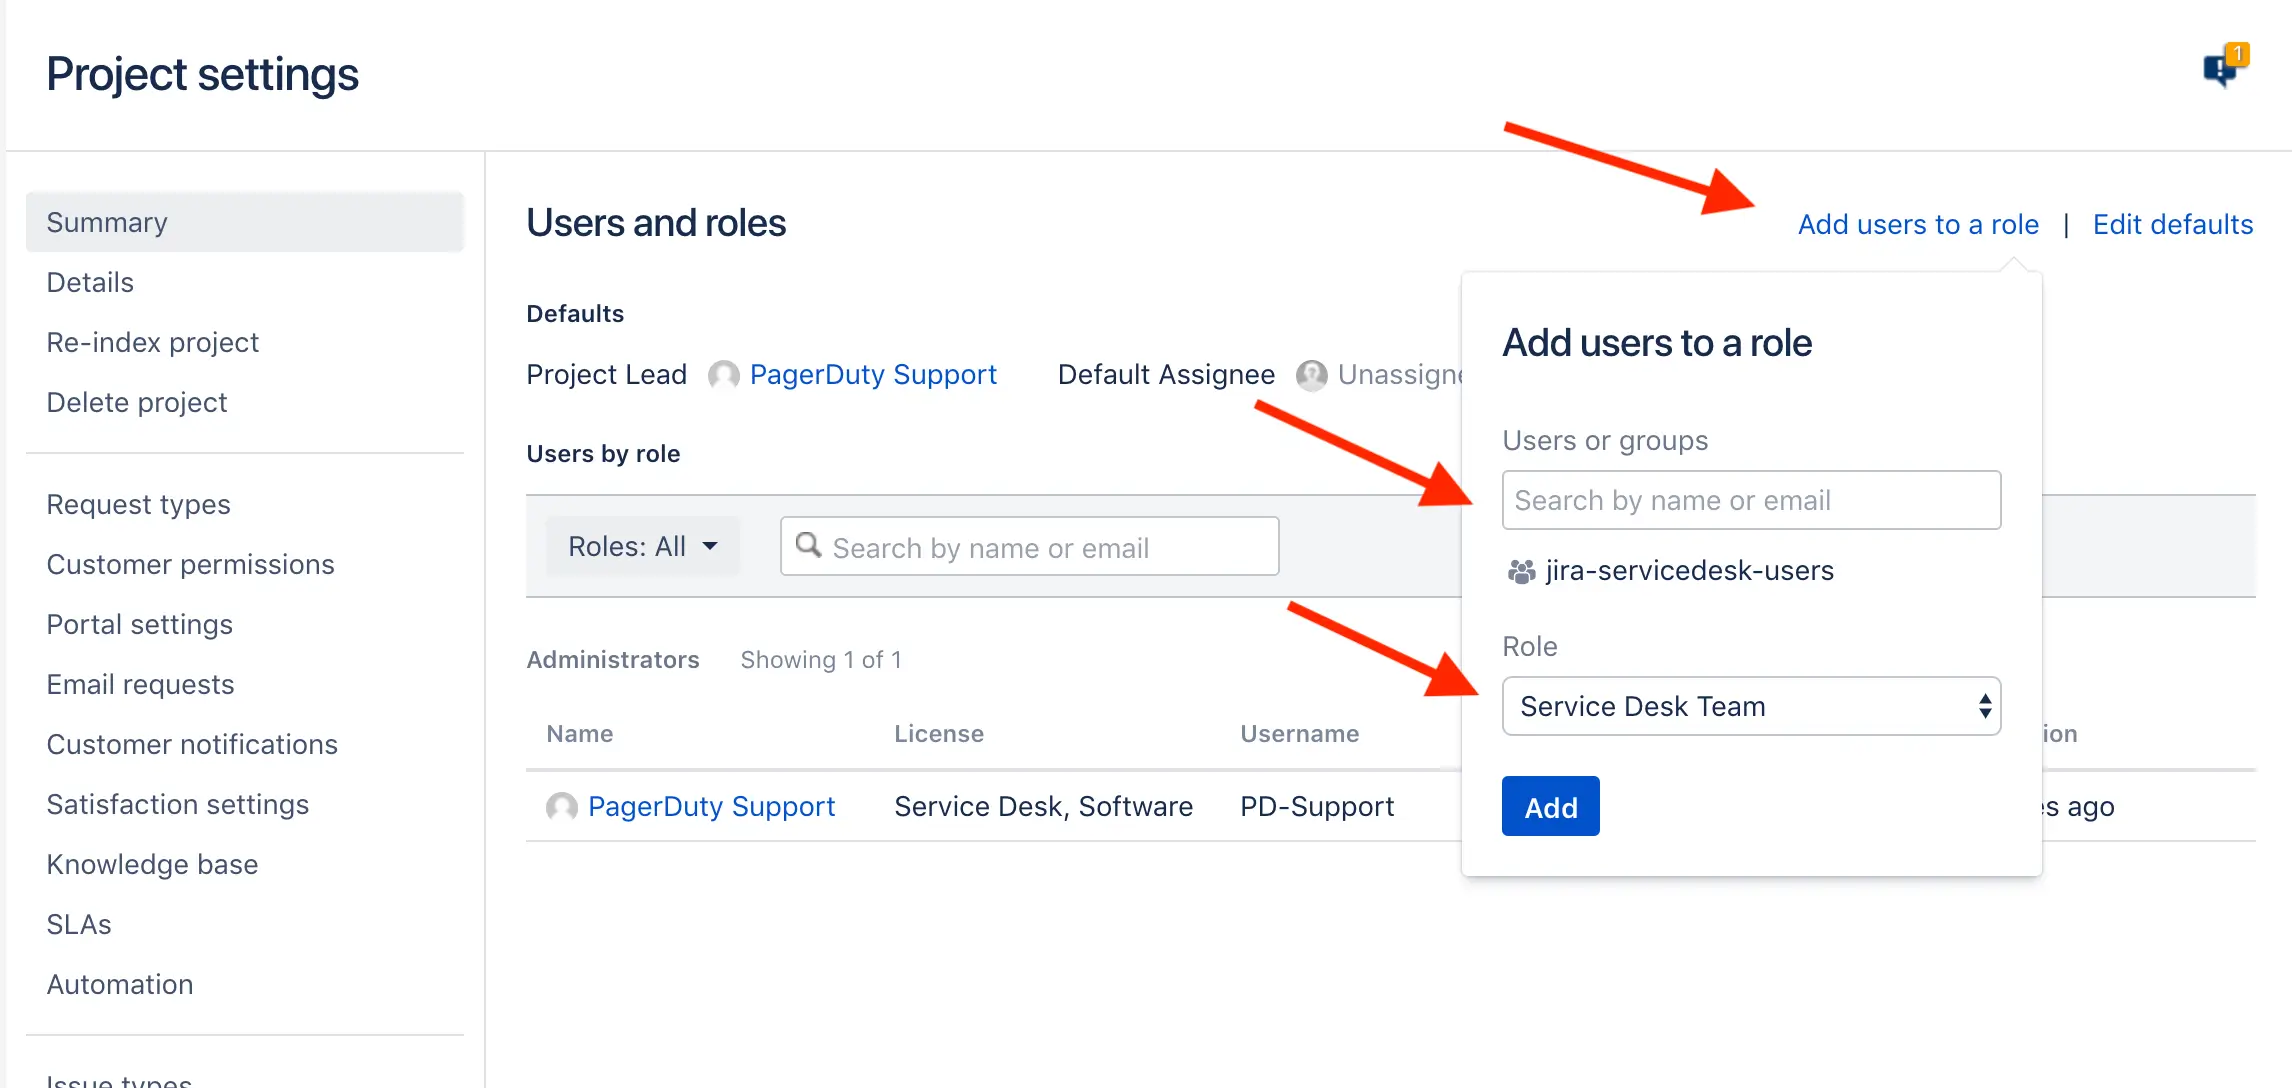 Configure Jira Service Management
You can learn more about managing users and roles on the Atlassian website.