# Manage Users
Add and manage users
View, add, edit, or delete users from your PagerDuty account.
## View Users
> **Required User Permissions:** All users, except Limited Stakeholders, can view users.
You can view a list of users in your account by navigating to **People** → **Users** in the PagerDuty web app.
### User License Counts
At the top of the Users page you can view how many of your licenses for **Full Users** or **Stakeholder Users** have been used.
### Search
You may use the left search bar to search for users by **name** or **email**.
### Filters
#### Filter by Team
From the **Team** dropdown you can filter users by:
- **All Teams**
- **My Teams**
- Or you can select a specific Team
#### Filter by Tags
From the **Tags** dropdown, you can search and select specific tags to filter users.
#### Filter by Base Role
From the **Base Roles** dropdown you can search and select base roles to filter users.
## Add Users
> **Required User Permissions:** Admin, Global Admin, and Account Owner base roles can add users.
>
> You can find users with a specific role by going to **People** → **Users** in the web app and making a selection from the **Base Roles** dropdown.
> **Free Plan User Limit:** Free plans are limited to five users.
To add a user:
1. In the PagerDuty web app, navigate to **People** → **Users**.
2. Click **Add Users** in the top right corner of the page.
3. Enter the user's **Name** (first and last) and **Email Address**.
4. If applicable, select the type of **License** you would like the user to have.
5. Select the desired **Base Role** for the user.
6. _Optional_: If your account has access to the [Teams](/account-admin/teams) feature, select a **Team** from the dropdown.
7. Click **Add**. Repeat steps 3–7 to add more users.
When you click **Add**, an invitation email will be sent to each user's email address. They will be prompted to accept the invitation to PagerDuty, choose a password, and set up their user profile.
> **Import Users from a CSV:** To add users in bulk, there is also an option to import users with a CSV file. See [Import Users from a CSV](/account-admin/manage-users/import-csv) to learn more.
> **SCIM User Provisioning:** You can also manage users via the standards-based SCIM protocol, by synchronizing the user database with common Identity Providers (IdPs). The IdPs currently supported are Okta, OneLogin, and MS Entra ID. See [SCIM User Provisioning](/account-admin/manage-users/scim-user-provisioning) to learn more.
### Common Issues When Adding Users
There are three common reasons why you may not be able to add a user to your account:
1. You do not have permission to add a user based on your user role. See the [Required User Permissions callout](#add-users) in the previous section.
2. There are [User License Limits](#user-license-limits) set on your account.
3. To add a new user, they must have a unique email, and you may be trying to add a user with an email that already exists in the account. To check if this user and their associated email already exist in your account, navigate to **People** → **Users** and search for their name or email in the left-hand search bar.
### User License Limits
Accounts on an annual plan have a Full User limit and a Stakeholder limit, based on the amount of licenses that have been purchased. You can view how many licenses have been purchased for your account at **People** → **Users** at the top of the page.
For example, if you have purchased 20 Full Users for your account, and there are already 20 Full Users on your account, then neither the Account Owner nor an Admin can add more users until the User License Limit is increased.
If you are an Account Owner or Admin and you receive the following errors trying to add new users, you must [add more user licenses](#add-user-licenses):
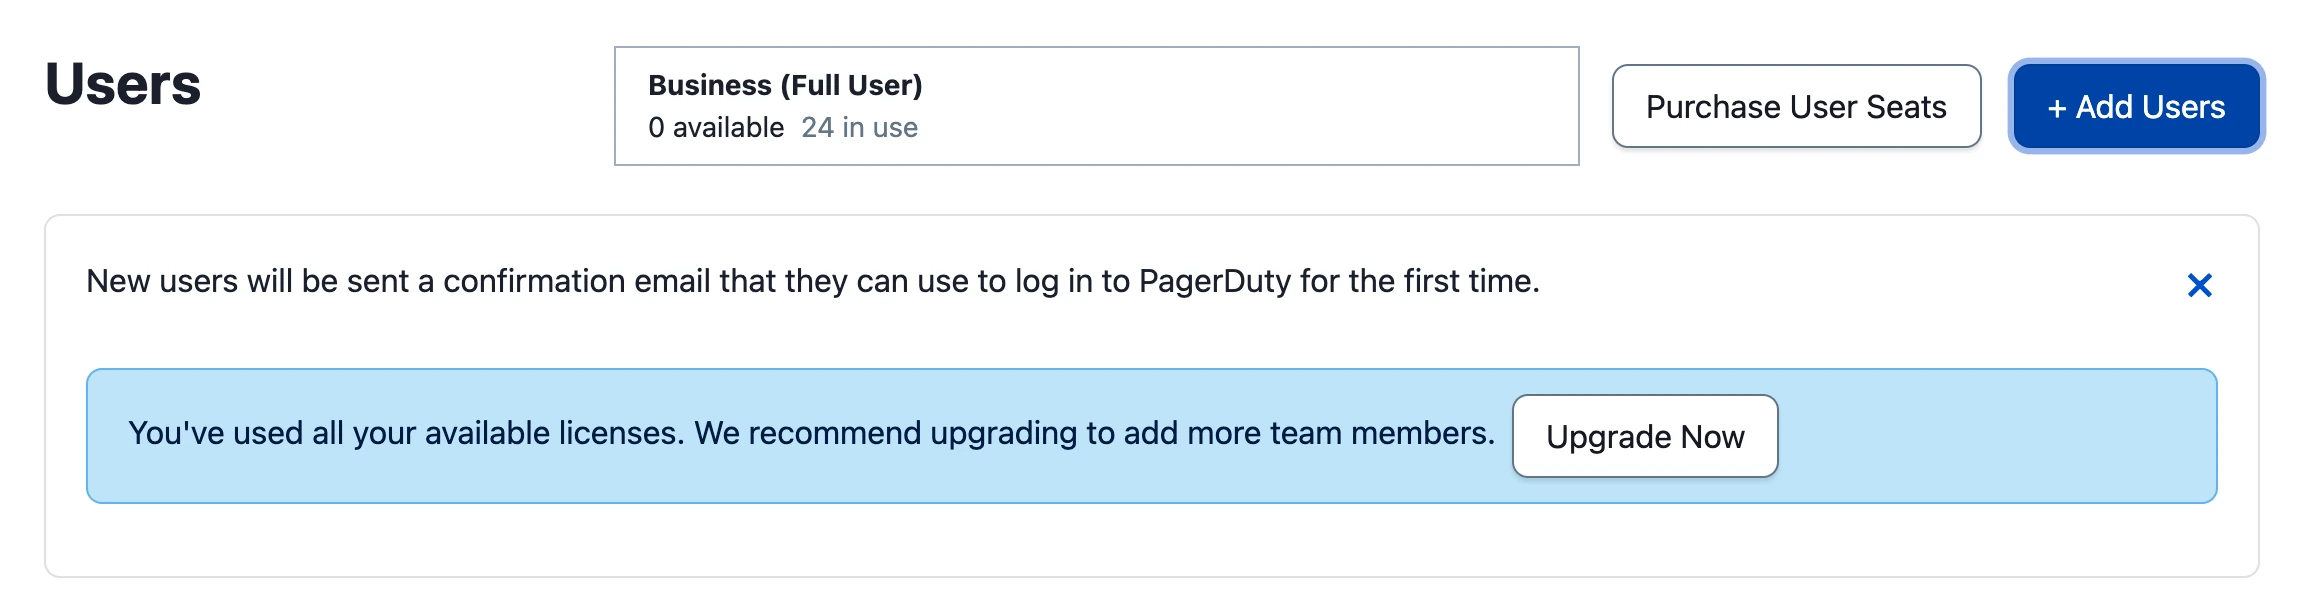
*User limit error message*
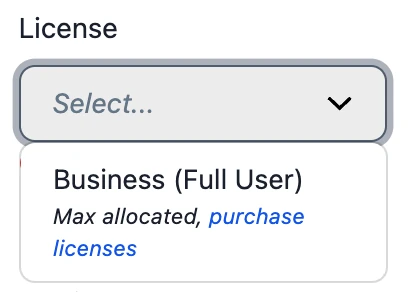
*Purchase user licenses*
Accounts with month-to-month pricing plans can limit the maximum number of users, which prevents you from inviting new users if the limit has been reached. For more information on this type of user limit, see the [Account Settings](/account-admin/account-settings#account-limits) article.
### Add User Licenses
> **Required User Permissions:** - For accounts that were created from 2023 onwards, both the Account Owner and Global Admins can add user licenses.
> - If your account was created prior to 2023, only Account Owners can add user licenses by default. You can, however, request that Global Admins also have access to add user licenses. Have your Account Owner [contact the Support team](https://www.pagerduty.com/contact-us/) if you would like this functionality.
To add user licenses:
1. In the PagerDuty web app, navigate to **User Icon** → **Subscriptions**.
2. In the **Add More Users** section, click to add more users. Click **Add More Users** to confirm.
3. In the modal that appears, select one of the following responses to **Do you require a purchase order for this order?**:
1. **Yes**: Enter your **PO Number** into the field. If you do not have one available, you may click **Not Available** and provide one at a later date.
2. **No**
4. Click **Complete Purchase**.
> **Add More Users Not Available:** If you cannot see the Add More Users section on your Subscriptions page, your account may have a user limit built into its pricing plan. In this case, refer to the [User Charges](/account-admin/billing#user-charges) section to add more users.
### Resend a User Invitation
> **Required User Permissions:** Admin, Global Admin, and Account Owner base roles can resend user invitations.
You can resend an invitation to a user if they cannot locate the first email that was sent.
1. In the PagerDuty web app, go to **People** → **Users**.
2. Click **Resend Invite** to the right of the desired user's information.
A new invitation email will be sent to the email associated with their PagerDuty account. Once a user has accepted an invitation and logged in to their account, the **Resend Invite** link no longer appears next to the user.
## Edit Users
### Edit User Roles
You edit user roles in different locations depending on which user role tier your account has:
- **[Basic User Roles](#edit-basic-user-roles)**: Accounts with a Free pricing plan, as well as some legacy plans, use basic user roles.
- **[Advanced Permissions](#edit-advanced-permissions-user-roles)**: Accounts with a Professional, Business, Digital Operations (legacy), or Enterprise pricing plan use Advanced Permissions.
#### Edit Basic User Roles
> **Required User Permissions:** Admins, Global Admins, and Account Owners can edit basic user roles.
1. Navigate to **People** → **Users**.
2. Click **Edit** to the right of the user's name.
3. Select your preferred **Role** from the dropdown.
4. Click **Save**.
> **Flexible Licensing:** If your account has the Flexible Licensing feature, see [Billing, Invoices and Payments](/account-admin/billing#manage-licenses-on-the-users-page) for more information about editing a user's role on the Users page.
#### Edit Advanced Permissions User Roles
[Base](#edit-base-roles), [Team](#edit-team-roles), and [object](#edit-object-roles) roles can be managed by different users on the account based on their level of permissions.
| Action | Manager (Team role) | Manager (base role) | Global Admin (base role) | Account Owner (base role) |
| :--------------------------------------------- | :------------------ | :------------------ | :----------------------- | :------------------------ |
| Can edit Team roles of users on _their_ Team | ✓ | ✓ | ✓ | ✓ |
| Can edit Team roles for any user on _any_ Team | | ✓ | ✓ | ✓ |
| Can edit base roles for any user | | | ✓ | ✓ |
| Can edit object roles for any user | | | ✓ | ✓ |
##### Edit Base Roles
> **Required User Permissions:** Users with an Account Owner or Global Admin base role can edit other users' base roles.
1. Navigate to **People** → **Users**.
2. Click **Edit** in the **Actions** column to the right of the user's name.
3. Select the desired **Base Role** from the dropdown.
4. Click **Save**.
##### Edit Team Roles
> **Required User Permissions:** - Users with an Account Owner, Global Admin, or Manager base role can edit other users' Team roles.
> - Users with a Manager _Team role_ can also edit the Team roles of users, but only for users on their Team.
**Account Owner, Global Admin, or Manager base roles**:
1. Navigate to **People** → **Users**. Select the user's **name** and click the **Permissions & Teams** tab.
2. Select the desired **Team Role** from the dropdown.
**Manager Team roles**:
Users with a Manager _Team role_ are only able to edit a user's Team role from their Team's page.
1. Navigate to **People** → **Teams**, then select your **Team**.
2. On the **Users** tab, select the appropriate role under the **Team Role** column for that user.
3. You should see a confirmation modal with the message that their role was updated successfully.
If a user is not yet part of a Team, see the [editing Teams](/account-admin/teams#edit-a-team) section.
##### Edit Object Roles
> **Required User Permissions:** Users with an Account Owner or Global Admin base role can edit other users' object roles. Note that object roles can only be given to users with a flexible base role — Restricted Access, Observer, Responder, or Manager.
1. Navigate to **People** → **Users**. Select the user's **name**, select the **Permissions & Teams** tab, and click **Edit** next to their Base Role.
2. Under **Additional Permissions** you can assign **Manager**, **Responder**, or **Observer** access to specific objects. Select a **Service**, **Escalation Policy**, and/or **Schedule** from the dropdown in the appropriate access level to assign an object role.
3. Click **Save**.
### Edit User Profiles
Read the [User Profiles](/account-admin/user-profile) article for more information on how to edit a user's profile information.
## Delete Users
> **Required User Permissions:** Admin, Global Admin, and Account Owner base roles can delete users.
> **Offboarding:** The offboarding feature allows administrators to easily deprovision users from their associated escalation policies, schedules, and assigned incidents. PagerDuty accounts with [Advanced Permissions](/account-admin/advanced-permissions) have access to the offboarding feature, which comes standard with the following pricing plans: Business, Digital Operations (legacy), and Enterprise for Incident Management. Read the [Offboarding](/account-admin/manage-users/offboarding) article for more information.
To delete a user:
1. Go to **People** → **Users**.
2. Locate the user that you would like to delete, click their **Name**, and then click **Delete User**.
3. If your account has [basic permissions](/account-admin/user-roles) you must confirm that you would like to delete the user. If your account has [advanced permissions](/account-admin/advanced-permissions), you enter the [Offboarding](/account-admin/manage-users/offboarding#offboard-a-user) flow to confirm deletion.
### Common Issues When Deleting Users
There are three common reasons why you may not be able to delete a user on your account:
1. You do not have permission to delete a user based on your user role. See the [Required User Permissions callout](#delete-users) in the previous section.
2. The user is still on-call, now and/or in the future, on a schedule and/or escalation policy. To check which schedules and/or escalation policies this user is still on-call for, navigate to **People** → **Users** → click their **name** → select the **On-Call Shifts** tab. You see their schedule, and their escalation policies are listed on the left.
3. There is at least one open incident assigned to that user.
> **Deleting Yourself or the Account Owner:** You may not delete your own user account or the Account Owner. If you want to delete your own user account, you need the Account Owner or an Admin to do so for you. If you want to delete the Account Owner, the current Account Owner must first [transfer account ownership](/account-admin/account-settings#change-account-owner) to a different user in the account, and then you can return and delete the previous owner's user account.